Web Interface
The Web Interface bundled with MetricsHub Community and MetricsHub Enterprise lets you configure resources and resource groups through guided forms, without editing YAML directly. This is the recommended way to configure resources and resource groups for most environments.
To access the forms, connect to https://MACHINE_WHERE_METRICSHUB_IS_RUNNING:31888 using an account with read-write (rw) permissions (see Managing users) and click Configuration.
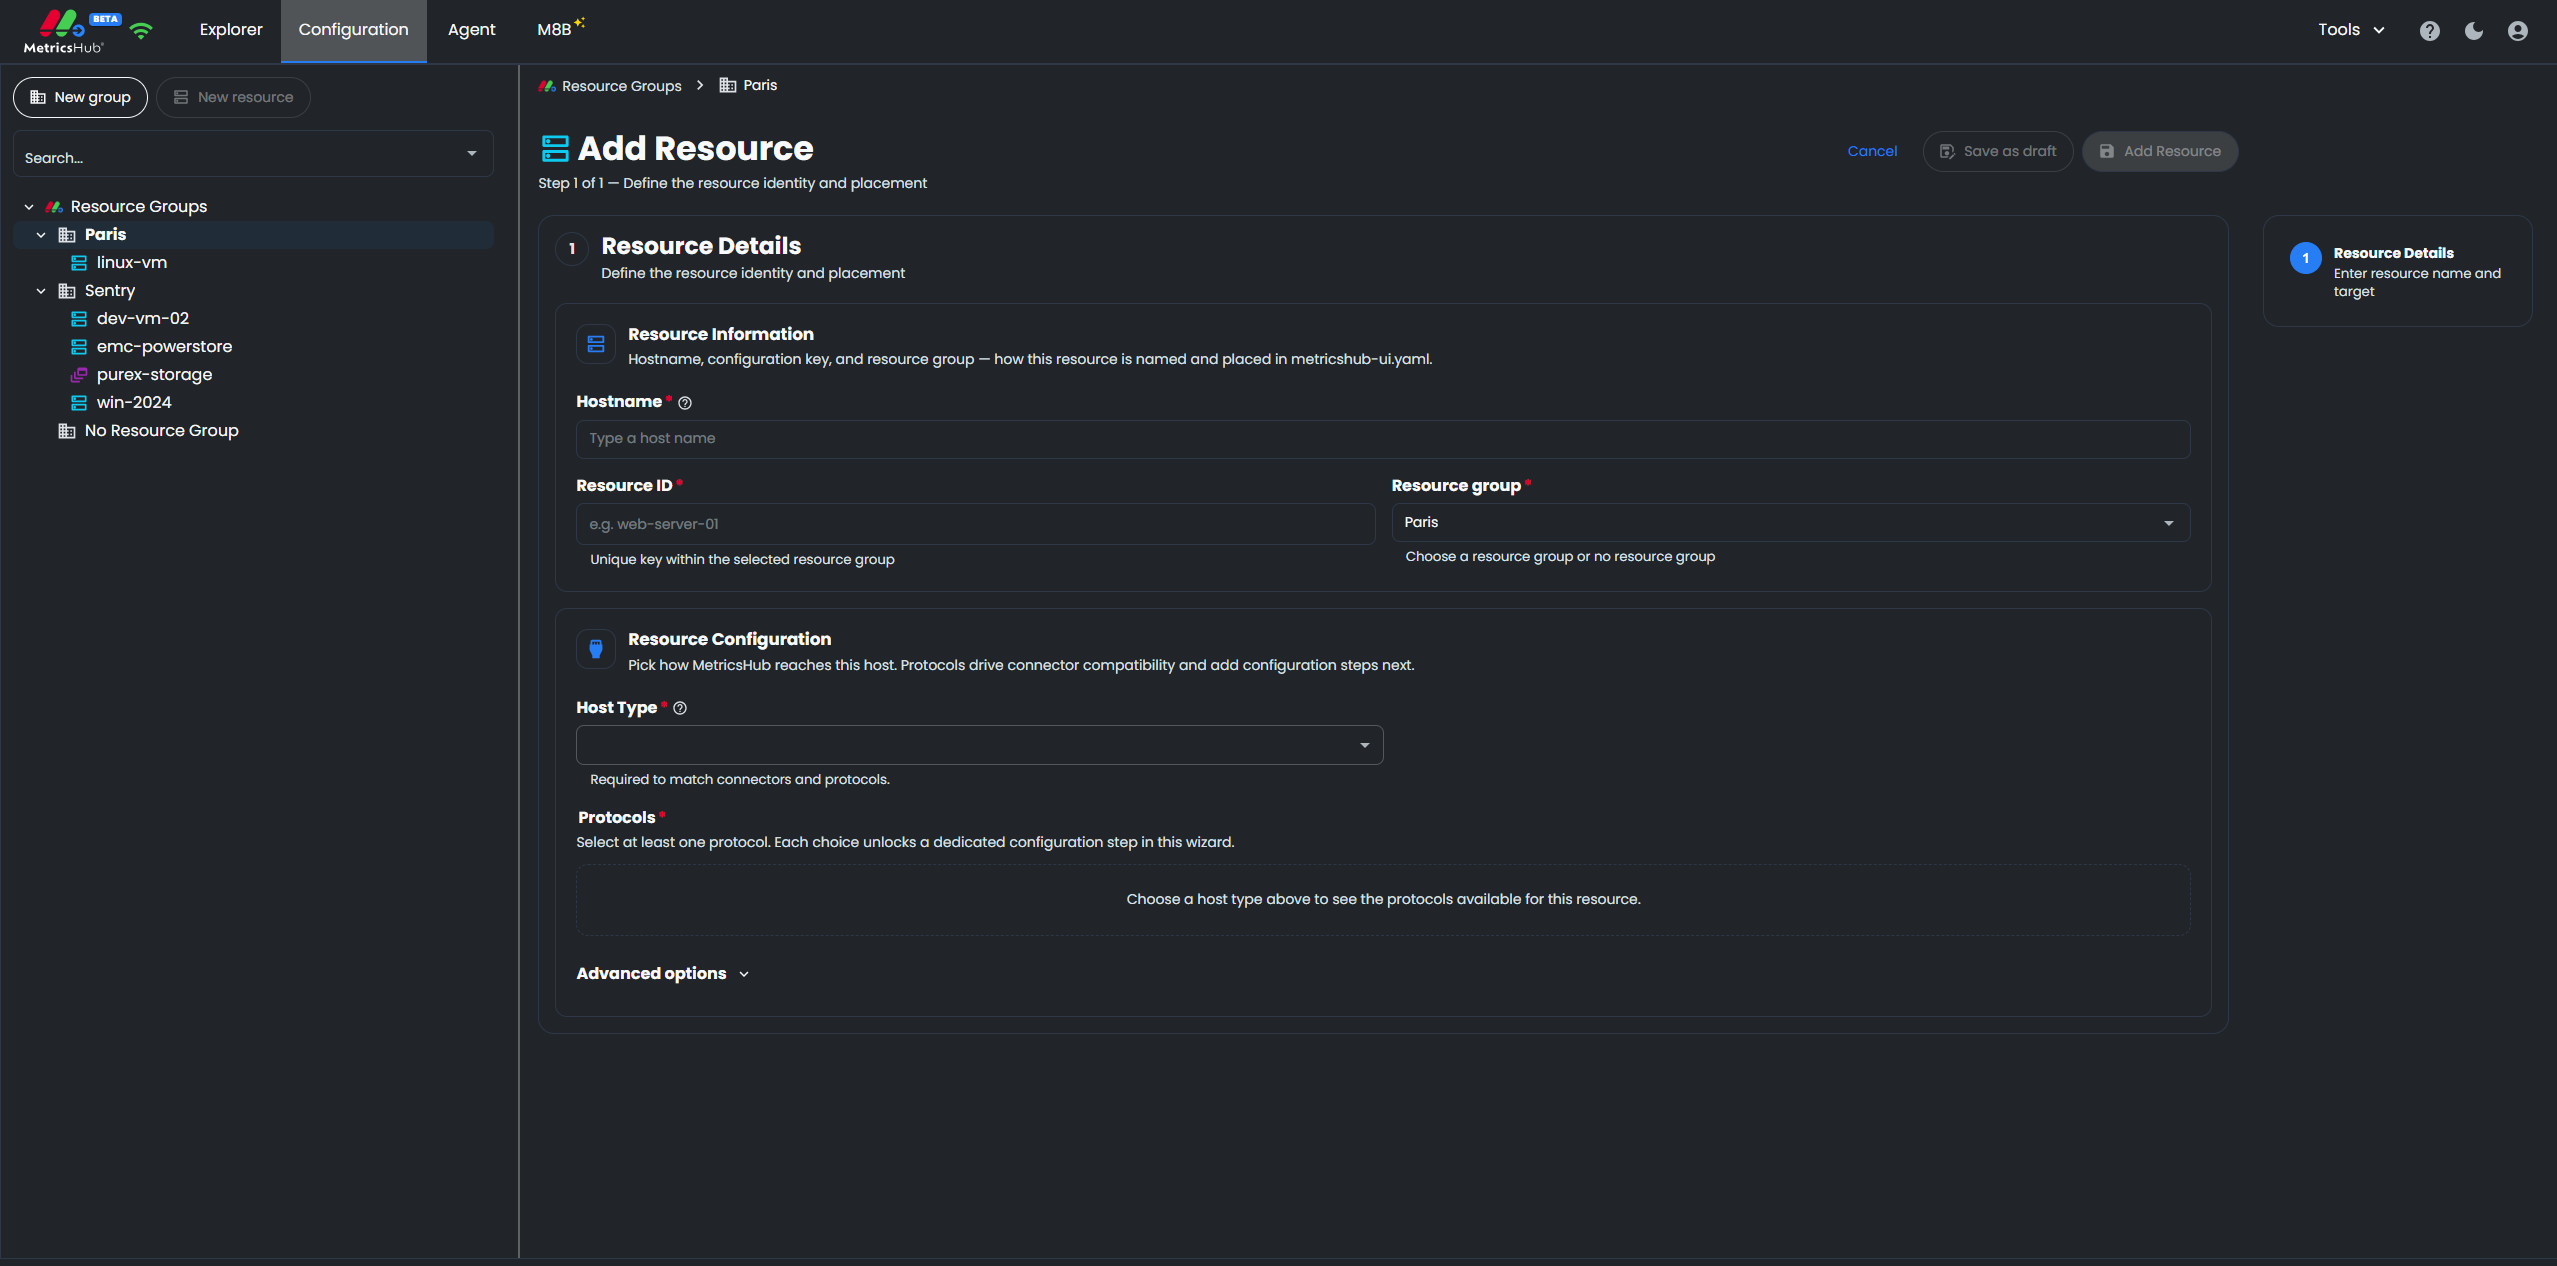
Adding a Resource
A resource is any entity you want to monitor: a server, a network switch, a storage array, a database, or an application.
To add a resource:
- Click New resource
- In the Hostname field, enter the hostname or IP address of the resource to be monitored. The Resource ID is filled in automatically
- Select the Resource group to which the resource belongs, or select No resource group
- Select the Host Type that matches the resource
- Select the Protocols used to connect to the resource and enter the required credentials. Click Test connection to validate the connection settings. Passwords are automatically encrypted
- In the Connectors step, select Automatic detection to let MetricsHub identify the compatible connectors, or select Manual selection to choose them yourself
- Click Add Resource.
Adding a Resource Group
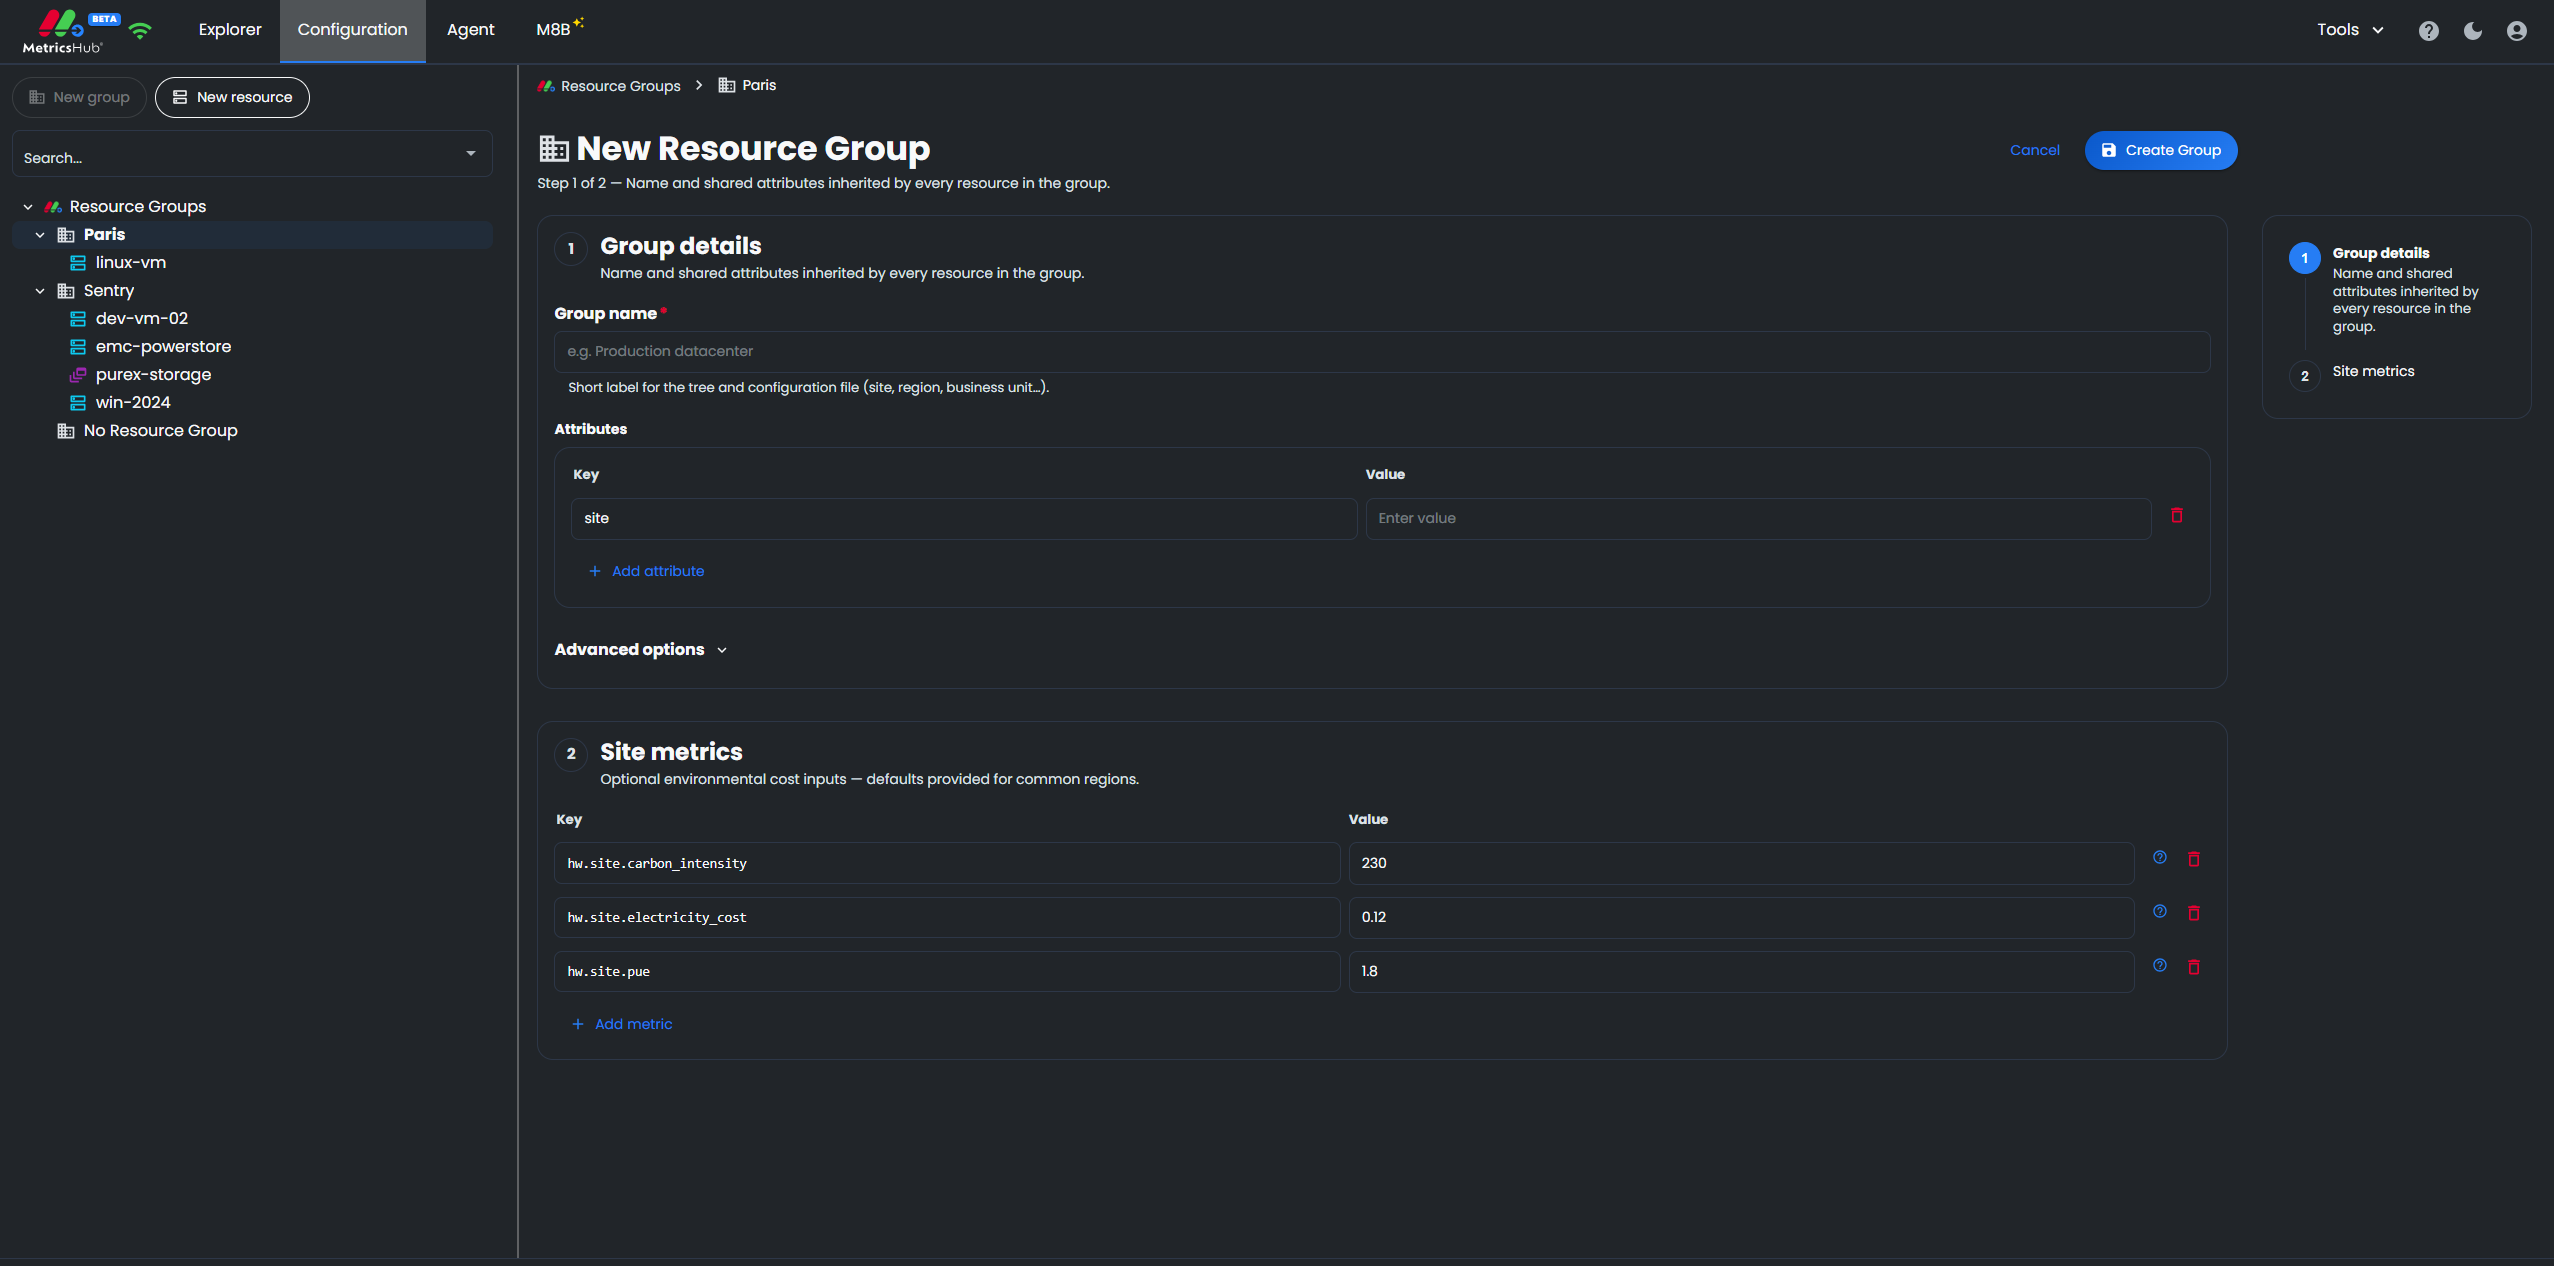
A resource group organizes resources that share a physical or logical location, such as a site, data center, or business unit. Resource groups are particularly useful in highly distributed infrastructures.
To add a resource group:
- Click New group
- Enter the Group name
- Define the group attributes, such as
site, and optionally configure the site metrics used for sustainability reporting - Click Create Group.
Where the Configuration Is Stored
Resources and resource groups created through the guided forms are saved in the metricshub-ui.yaml configuration file.
To view or edit this file, click Tools > YAML Editor.